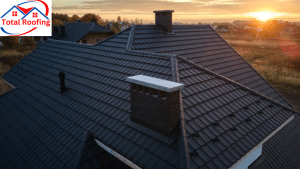
When tackling a slate roofing project, checking for wear, selecting the right materials, and having the proper tools are essential. Ensuring safety with harnesses and ladders, preparing the roof surface meticulously, and using expert installation techniques are critical steps. From laying the tiles with precision to securing them firmly, attention to detail matters. Don’t forget about the finishing touches for visual appeal and durability. Regular maintenance like inspections and gutter cleaning will help prolong your slate roof’s lifespan. Mastering these DIY tips will set you on the path to a successful installation.
Key Takeaways
- Properly lay out slate tiles for optimal performance and aesthetics.
- Use correct tools like slate cutters and roofing nails.
- Ensure secure fastening with proper nail spacing and maintenance.
- Follow manufacturer guidelines for installation and maintenance.
- Regular inspections and prompt repairs for long-lasting slate roofing.
Roof Inspection
Let’s start by thoroughly examining the roof for any existing damage or potential issues. When evaluating the roofing material, we should pay close attention to signs of wear and tear caused by weather damage. Inspecting for cracked or missing slate tiles, loose flashing, or damaged underlayment is vital to guarantee the roof’s integrity. Weather elements like heavy rain, hail, snow, or strong winds can take a toll on the roofing material over time, leading to leaks or structural issues if not addressed promptly.
To identify weather damage, look for water stains on the ceiling, mold growth, or visible signs of moisture in the attic. These indicators often point to areas where the roofing material may be compromised. Furthermore, checking the roof after severe weather events can help catch any damage early on and prevent further deterioration. Regular inspections and maintenance are key to prolonging the lifespan of your slate roofing and maintaining a secure and functional roof over your head.
Material Selection
After thoroughly examining the roof for any existing damage or potential issues, the next step is selecting the right materials for the slate roofing installation. When it comes to material selection, there are various factors to take into account. To begin with, color options play a significant role in the overall aesthetics of your property. Slate roofing comes in a range of colors, from traditional greys to vibrant greens and purples, allowing you to choose a style that complements your home. Pricing is also essential, as slate roofing can vary in cost depending on the quality and source of the materials.
In addition to color and pricing, understanding installation techniques and maintenance suggestions is crucial. Proper installation techniques are indispensable to guarantee the longevity and durability of your slate roof. It is recommended to follow manufacturer guidelines and best practices for installation. When it comes to maintenance, regular inspections, cleaning, and repairs are key to preserving the condition of your slate roof and preventing any potential issues. By carefully taking into account color options, pricing, installation techniques, and maintenance suggestions, you can make informed decisions for your slate roofing project.
Tools and Equipment
Let’s start by going over the necessary tools for installing slate roofing, making sure we have everything from hammers to slate cutters. Once we have our tools in place, we need to prepare our equipment for the task ahead, ensuring everything is well-maintained and ready to go. Moreover, don’t forget about the importance of having the right safety gear, such as sturdy boots, gloves, and harnesses, to guarantee a secure work environment.
Necessary Tools Overview
We will need a variety of tools and equipment to effectively install slate roofing. Proper tool maintenance and workspace organization are essential for a smooth installation process. Safety training and budget planning are also significant aspects to contemplate before starting the project.
Here is a table outlining the necessary tools for installing slate roofing:
| Tools | Description |
|---|---|
| Slate ripper | Used to remove existing slates and nails from the roof |
| Roofing hammer | Essential for securing the slates in place |
| Slate cutter | To trim slates to fit specific areas of the roof |
| Ladder | Provides access to the roof safely |
| Safety harness | Ensures the safety of the worker at heights |
| Roof brackets | Helps secure the ladder to the roof for stability |
Equipment Preparation Steps
To prepare the equipment for installing slate roofing, we must make sure all tools are in peak condition and readily accessible. It is important to prioritize tool maintenance to guarantee smooth progress during the project. Before starting, carefully select the appropriate materials for the job to secure a durable and visually appealing result. Weather protection is vital, so it is advisable to check the forecast and take necessary precautions. When organizing tools, consider their sizes and weights for easy handling. Keep all equipment in a convenient location to avoid unnecessary disruptions during the installation process. Assure that safety precautions are strictly followed, including wearing appropriate gear and setting up barriers to prevent accidents. By taking the time to prepare our equipment properly, we can streamline the roofing process and achieve a successful outcome.
Safety Gear Requirements
Ensuring the proper safety gear is vital for working with tools and equipment during slate roofing installation. Safety precautions should always be a top priority when working at heights. When it comes to rooftop attire, gear essentials play an important role in protecting yourself from potential hazards. A proper roofing outfit typically includes a sturdy hard hat to shield your head from falling debris, non-slip footwear to maintain traction on steep surfaces, and safety goggles to prevent eye injuries. In addition, wearing gloves can help improve your grip while handling tools and materials on the roof.
When selecting safety gear, make sure it meets industry standards and is in good condition to provide adequate protection. Investing in high-quality safety equipment may require a bit more expense upfront, but it is a small price to pay for your well-being. Prioritize your safety by wearing the necessary rooftop attire and gear essentials for a successful slate roofing installation.
Safety Precautions
Prior to starting the installation of slate roofing, it is important to prioritize safety precautions to prevent accidents and injuries. Here are some vital safety measures to keep in mind:
- Use a Safety Harness: When working at heights, always wear a dependable safety harness that is properly secured to prevent falls and guarantee your safety.
- Practice Proper Ladder Safety: Ensure your ladder is stable on a flat surface, extend it at least three feet above the roof edge, and have someone hold the base while you climb to improve stability.
- Stay Alert and Focused: Avoid distractions while working on the roof, stay focused on the task at hand, and be aware of your surroundings to prevent accidents.
- Check Weather Conditions: Before starting the installation, check the weather forecast. Avoid working on the roof during windy, rainy, or icy conditions to prevent slips and falls.
Roof Preparation
First things first, before we lay down the slate tiles, we need to inspect the surface of the roof to verify it’s in good condition. Once that’s done, we’ll apply the underlayment to provide an extra layer of protection against the elements. Finally, we’ll install the flashing to prevent water from seeping into vulnerable areas, completing the essential steps for preparing the roof for the slate installation.
Surface Inspection
Let’s begin by carefully examining the surface of the roof to assess its condition before proceeding with the slate installation. Ensuring the roof is in good shape is vital for the longevity of the slate roofing. Here are some essential steps to follow during the surface inspection:
- Surface Repair: Look for any damaged areas on the roof surface that may need repair before laying the slate. Addressing these issues promptly will prevent further damage once the slate is installed.
- Weather Protection: Check for signs of wear and tear caused by weather exposure. Make sure the surface is adequately protected against elements like rain, snow, and UV rays to maintain the integrity of the slate roof over time.
- Maintenance Tips: Implement regular maintenance routines to extend the lifespan of the roof. Cleaning out debris and inspecting for any issues can prevent costly repairs down the line.
- Cleaning Techniques: Use appropriate cleaning techniques to remove dirt, moss, or algae that may have accumulated on the roof surface. Keeping the roof clean will not only enhance its appearance but also prevent deterioration.
Underlayment Application
After examining the surface of the roof for any necessary repairs and maintenance, the next step involves applying the underlayment as part of the roof preparation process. Underlayment serves as a vital barrier against water infiltration, protecting the roof and the structure underneath. When applying underlayment, make sure it is smooth, wrinkle-free, and properly sealed to maximize its effectiveness.
Here is a table outlining some key aspects of underlayment:
| Underlayment Benefits | Application Tips |
|---|---|
| Provides waterproofing protection | Start from the eaves and work upwards |
| Acts as a secondary barrier in case of slate damage | Overlap seams according to manufacturer guidelines |
| Improves the roof’s overall durability | Use compatible fasteners to secure the underlayment |
When considering underlayment material options, factors such as cost and effectiveness come into play. Common choices include synthetic underlayment, felt underlayment, and rubberized asphalt underlayment. Synthetic underlayment tends to be more costly but offers superior durability, while felt underlayment is a budget-friendly option. Rubberized asphalt underlayment provides excellent waterproofing but at a higher price. Conducting a cost analysis based on your budget and roofing needs can help determine the most suitable underlayment material for your slate roofing project.
Flashing Installation
We start the roof preparation process by installing the flashing to guarantee proper waterproofing and protection at vulnerable areas of the slate roofing system. Flashing techniques play an essential role in preventing water infiltration and maintaining the integrity of the roof. Here are some necessary tips for flashing installation:
- Proper Material Selection: Choose high-quality flashing materials such as copper or galvanized steel for durability and longevity.
- Precise Installation: Make sure that the flashing is installed correctly at junctions, valleys, chimneys, and skylights to create a watertight seal.
- Sealing Techniques: Use appropriate waterproofing methods like sealants or tapes to reinforce the flashing and prevent leaks.
- Regular Maintenance: Inspect the flashing periodically for any signs of damage or deterioration. Promptly address any issues with repair solutions like recaulking or replacing damaged sections.
Installing Underlayment
To properly install underlayment for slate roofing, make sure the surface is clean and free of debris before laying down the material. Underlayment plays a vital role in protecting the roof structure from water infiltration and providing an extra layer of insulation. There are various types of underlayment available, such as synthetic underlayment and asphalt-saturated felt, each offering different benefits like enhanced durability and resistance to tearing.
Proper underlayment techniques are essential for ensuring the longevity and effectiveness of the slate roofing system. It is important to carefully overlap the underlayment sheets to prevent water from seeping through the gaps. Moreover, proper installation of underlayment helps in creating a watertight barrier that shields the roof from leaks and moisture damage.
Taking the time to install underlayment correctly can notably impact the overall performance and lifespan of the slate roofing. Prioritizing these steps will contribute to a more durable and resilient roofing system that can withstand various weather conditions effectively.
Laying Slate Tiles
When laying slate tiles, ensure proper alignment and spacing to achieve a visually appealing and functional roofing surface. Ensuring that the slate patterns are consistent and the tiles are evenly spaced is crucial for a professional finish that not only looks good but also performs well in protecting your home. Here are some key tips to keep in mind:
- Tile Layout: Before starting the installation, plan the layout of the slate tiles to determine the best arrangement that complements the overall design of your roof.
- Maintenance: Regular maintenance is essential to prolong the lifespan of your slate roofing. Inspect the tiles periodically for any signs of damage or wear and tear, and address them promptly to prevent further issues.
- Repair Techniques: Familiarize yourself with repair techniques such as replacing broken tiles or fixing loose ones. Having the knowledge to perform minor repairs can save you time and money in the long run.
- Alignment and Spacing: Pay close attention to the alignment and spacing of the slate tiles during installation to avoid any unsightly gaps or overlaps that could compromise the integrity of the roof.
Securing Slate Tiles
Let’s discuss the main aspects of securing slate tiles. Proper nail placement is essential to guarantee the tiles stay in place during severe weather conditions. We’ll also cover the roofing underlayment requirements and the recommended tools for a successful installation.
Proper Nail Placement
For securing slate tiles, the key is to maintain proper nail placement to uphold the integrity of the roofing structure. Here are some essential tips to guarantee the longevity and stability of your slate roof:
- Nail Spacing: Maintain consistent spacing between nails to prevent stress concentrations on the slate tiles. Properly spaced nails distribute the weight and wind loads evenly across the roof surface.
- Weather Protection: Use durable fasteners like copper nails or stainless steel screws that can endure harsh weather conditions. These materials resist corrosion and prevent premature deterioration of the roofing system.
- Maintenance Tips: Regularly inspect the nails to check for any signs of loosening or rust. Replace any damaged or missing nails promptly to preserve the structural integrity of the roof.
- Secure Installation: Drive the nails flush with the slate surface without overdriving them. Properly secured nails prevent uplift during strong winds and guarantee the tiles stay in place for years to come.
Roofing Underlayment Requirements
Securing slate tiles properly necessitates adhering to specific roofing underlayment requirements to guarantee a robust and long-lasting installation. When considering installation techniques, it’s essential to choose the right underlayment material to prevent water infiltration and enhance the roof’s durability. Weatherproofing strategies play a crucial role in maintaining the integrity of the slate roof over time. The underlayment acts as a barrier against moisture, preventing it from seeping into the roof structure and causing damage. Effective waterproofing methods are necessary for ensuring that the slate tiles remain secure and in best condition.
To enhance moisture prevention, selecting a high-quality underlayment that offers superior protection against rain and snow is vital. Weather-resistant underlayment materials can greatly prolong the lifespan of the slate roof by shielding it from the elements. By following proper roofing underlayment requirements, such as using the correct materials and techniques, you can create a watertight barrier that enhances the weatherproofing capabilities of your slate roof.
Recommended Tools for Installation
We recommend using specialized slate roof hooks to secure slate tiles effectively during the installation process. These hooks provide a secure grip on the slate without causing damage, ensuring a stable and long-lasting roof. Here are some other important tools for installing slate roofing:
- Slate Cutter: A slate cutter is essential for making precise cuts on the slate tiles to fit them perfectly on the roof without any gaps.
- Roofing Nails: High-quality roofing nails are necessary for securing the slate tiles in place. Make sure they are long enough to penetrate both the tile and the roof deck securely.
- Hammer: A good hammer is required for driving the roofing nails into the tiles. Choose a hammer with a comfortable grip to reduce hand fatigue during the installation process.
- Roofing Ladder: To access different areas of the roof safely, a sturdy roofing ladder is vital. Make sure to follow proper ladder safety guidelines to prevent accidents.
Finishing Touches
Let’s now focus on adding the final touches to complete the installation of your slate roofing. When it comes to slate color choices and finishing techniques, it’s vital to take into account the overall aesthetic appeal of your roof. Selecting the right slate color can greatly impact the visual harmony of your property. Moreover, employing proper finishing techniques such as ensuring uniformity in the layout and alignment of the slates can enhance the overall appearance of the roof.
Weatherproofing is another critical aspect to keep in mind during the finishing touches of your slate roofing. Ensuring that all seams are properly sealed and using weather-resistant materials can help prevent leaks and damage caused by inclement weather. This step not only enhances the longevity of your slate roof but also contributes to its overall aesthetic appeal.
Roof Maintenance
Maintaining regular roof care is crucial for preserving the integrity and longevity of your slate roofing. By staying on top of roof sealing and maintenance, you can enhance the weatherproofing and durability of your slate roof. Here are four key maintenance tasks to keep your slate roofing in peak condition:
- Inspect Regularly: Conduct routine examinations to check for any loose or damaged slates, as well as any signs of water damage or leaks. Addressing these issues promptly can prevent more extensive damage to your roof.
- Clean Gutters: Clear debris from gutters and downspouts to ensure proper drainage. Blocked gutters can lead to water backup and potential water damage to your slate roof.
- Trim Overhanging Branches: Trim back any tree branches that hang over your roof. Falling branches can cause damage to your slate tiles and compromise the integrity of your roof.
- Professional Inspections: Schedule professional roof evaluations at least once a year to identify any underlying issues and ensure your slate roof is in prime condition for long-term durability.
Conclusion
To sum up, when installing slate roofing, it’s crucial to follow these DIY tips for a successful project. By inspecting the roof, selecting the appropriate materials, using the correct tools and equipment, taking safety precautions, preparing the roof adequately, laying and securing the slate tiles, and adding finishing touches, we can guarantee a job well done. Remember, regular maintenance will keep your slate roof looking great for years to come.